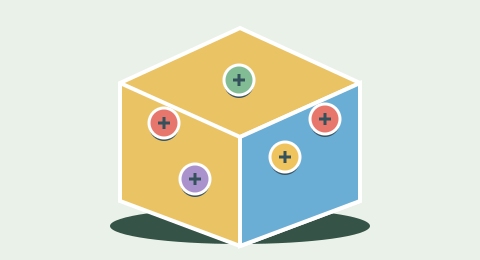
A different reason to remove a screw
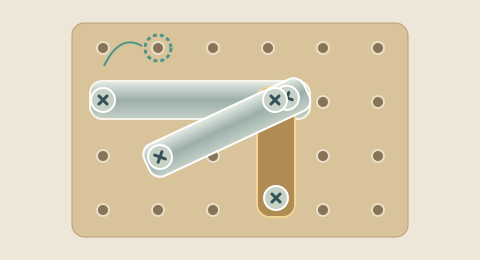
Screw Escape uses support removal to create a route rather than to clear every object. A ramp is useful because it remains on the board and points the marble in a chosen direction. Pulling the right support leaves the left side holding the ramp and slopes the route to the right; pulling the left support sends the route left. The board shows the chosen direction with an arrow. Once you commit that ramp, you cannot freely flip it back. This makes planning matter even though there is no timer. The question is not how many screws you can remove, but which supports must remain to carry the marble safely.
Read the route from top to bottom
The marble starts near the top of a grid of ramps. Every selected ramp sends it diagonally to one of the neighboring columns in the next row. Red chutes mark blocked arrivals. Brass keys mark required arrivals, and the green exit is the final destination. Follow the pale connector lines when comparing two possibilities. A route can stay inside the board and still fail if it misses a key, so look farther than the next safe-looking ramp. The goal includes every key as well as the exit. An unused ramp away from the marble’s path does not need to be dismantled.
Supports, slope and commitment
Each undecided ramp has two selectable supports. The visible right support corresponds to a rightward slope, and the left support corresponds to a leftward slope. Removing one chooses the direction for that ramp and leaves the other support in place. There is no second removal that drops the entire ramp out of the puzzle. This is a deliberate routing rule, not a general-purpose simulation of every possible mechanical interaction. If the marble is waiting at that ramp, it begins following the newly available route. If the ramp is farther ahead, your choice prepares it for the marble’s eventual arrival.
The marble waits for a decision
A marble reaching an undecided ramp stops there. It does not fall through an unfinished board while you are thinking. You can inspect the next rows, set later ramps, or pause. When a continuous section is ready, the marble follows it until it reaches another undecided ramp or a result. Its movement is animated slowly enough to show the chosen path. The underlying route is deterministic: the same layout and committed ramp directions produce the same outcome. Timing a click during a rolling animation is not a hidden requirement. Input is locked while the transition resolves so repeated taps cannot change the same ramp twice.
Level 1: learn a short mechanical chain
The warm-up contains three rows and three columns. Start by locating the key and the exit, then trace a route back toward the marble. Remove one support and watch how the arrow and marble position change. A choice that points beyond the edge of the board is not a shortcut. Try to predict the next arrival before making it. This short level teaches the relationship between the side you release and the direction of travel. Once you understand that relationship, the expert level adds a longer planning problem without changing the basic interaction.
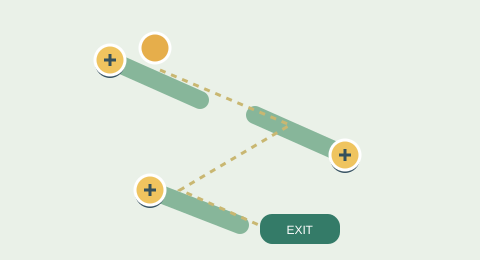
Level 2: plan through several checkpoints
The expert board contains twelve ramp rows and five columns. Required keys create checkpoints along the descent, and blocked chutes remove some of the apparent routes. A valid construction route is included in the seeded generator, so there is a way to reach every key and the exit from the starting arrangement. Your own early choices can still make that route unavailable. Long routes also contain unnecessary ramps, which can distract from the cells the marble will actually visit. The expert target is intentionally demanding, but a measured one-percent human completion rate has not been established. Take time to trace the board instead of treating every exposed screw as a useful move.
Work backward from the next key
A key can only be reached from a neighboring column in the preceding row. Start at that key and consider which of those approach cells can be reached safely. Continue backward until you connect to the marble’s current position. This narrows the decision more effectively than choosing whichever direction looks open immediately below the marble. Once you have reached a key, repeat the process for the next checkpoint or the exit. You are solving connected short routes within one larger board. The pale lines help reveal adjacency, while the red and brass markers identify the arrivals that change the outcome.
Avoid unnecessary commitments
Preparing a later ramp can be helpful when you know that the marble must reach it. Preparing many unrelated ramps simply because they are visible creates commitments without adding useful information. A later decision may turn out to be on the wrong approach to a key. Leave uncertain ramps undecided until you have traced the relevant connection. This is especially useful near a narrow passage, where a route can arrive safely but then be forced toward a blocked chute. Before removing a support, ask which next arrival the slope creates and whether that arrival still connects to the next required checkpoint.
Failure and recovery
The run ends when the marble leaves the grid, enters a blocked chute, misses a required key row or reaches the bottom in the wrong column. The result message identifies the kind of failure. Undo restores the state before your last support removal once per run. The Level 2 Rescue also restores the preceding support decision, using its own once-per-run allowance; it is not an extra buffer slot as in the color-collection modes. If that preceding decision was unrelated to an earlier wrong turn, a rewind may not repair the whole route. Retry preserves the same seed, making it useful for revisiting the point where your path diverged.
Controls and a readable board
Tap or click a support, or use Tab and the keyboard activation keys. On a small screen the expert board is scrollable so the ramps and markers remain readable. Scroll to inspect the next checkpoint before choosing a support; scrolling itself is not a move. The controls include Help, Pause, Retry and New layout. A safe Hint highlights the next support only when a complete continuation can be established from the current route; it is not automatically spent when no route is found. Signed-in runs use account inventory and earn 2 or 10 Points for a verified clear. Guest practice stays separate. Video rewards remain unavailable.
Repeatable routes and shared layouts
The seed determines the starting column, checkpoints, blocked chutes and exit. Share copies that versioned starting arrangement, allowing another player to solve the same route without copying your committed ramps. Your local action history can restore your own attempt when storage is available. If you want to compare strategies, use Retry and keep track of the first support decision you change. A route puzzle is easier to learn from when the underlying map stays constant. The rolling motion is a visual explanation of the route, while the game’s discrete arrival rules determine success and failure consistently across replay.
A worked example: the safe turn that misses a key
Suppose the next key is in the middle column two rows below the marble. A left turn and a right turn may both avoid the immediate red chutes. Check their second arrivals before deciding. One approach may be able to return to the middle, while the other encounters a blocked chute or a committed ramp pointing away. Make the choice that preserves the key arrival, even if the other direction looks more open at first. Reaching a safe cell is only useful when it still connects to the required route.
Screw Escape FAQ
Do I need to remove every screw?+
No. Build a route through every key to the exit. Ramps outside that route may remain untouched.
Which support sends the marble right?+
Remove the right support. Removing the left support creates a leftward slope. The arrow shows the committed direction.
What happens at an undecided ramp?+
The marble waits. There is no countdown or requirement to click before it falls.
What causes a loss?+
Leaving the grid, arriving at a red chute, missing a required key or reaching the bottom away from the exit ends the run.
Can I prepare ramps farther down?+
Yes. A later ramp can be set before the marble arrives. Make sure it belongs to the route you intend to use.
How does Rescue differ here?+
The Level 2 Rescue rewinds the last support removal. It does not add storage or delete a hazard.
Is this a full physics sandbox?+
No. It is a deterministic ramp-routing puzzle with animated movement. The same committed route produces the same result without frame-rate-dependent timing.
Can I freely switch a ramp after choosing it?+
No. A support choice is committed. Use an available Undo or Rescue, or retry the same layout.
How many levels are available?+
Two: a three-row teaching board and a twelve-row expert challenge with more columns and checkpoints.
Are my results verified for rewards?+
Signed-in verified clears earn 2 Points for Level 1 and 10 for Level 2. Helpers use account inventory. Guest runs are free local practice.